Before we start with this section, I want to mention that everything that is done using the W3 Total Cache plugin can be done in the AWS console. The plugin is going to help to configure CloudFront distribution and S3 bucket in case that we want to use it. Of course, if you are brave and have an advanced knowledge you can decide not to use it and get the same outcome configuring it through the console.
Ok, let’s proceed to follow the steps to configure Wordpress to leverage CloudFront to serve static content to the users like images, CSS, JS, etc.
Steps to Configure WordPress with CloudFront using W3 Total Cache
Create an AWS IAM user
An IAM user is required for the plugin to create and manage the CloudFront distribution and S3 buckets (if you choose to use them for image storage).
Log in to your AWS account console and go to IAM > Users > Create user. In my example, I named my wordpress-w3-total-cache but you can choose whatever you wish.

No need to provide console access.

As this user is used specifically for this plugin, choose Attach policies directly to attach the security policy to grant the user the required permissions.

In permissions, give Full Access for S3 and CloudFront. This is needed by the plugin to be able to create and modify S3 bucket.
Following best security practises, it's recommended to create and attach a policy with the least permissions. This means restricting access to the specific resources that the plugin needs. You can do this after the plugin creates the resources.
For example, if the S3 bucket name created is arn:aws:s3:::wordpress-w3-total-cache-bucket, you would add "Resource": "arn:aws:s3:::wordpress-w3-total-cache-bucket" to the S3 policy. The same applies for the CloudFront distribution resource.
You can use http://awspolicygen.s3.amazonaws.com/policygen.html to create a policy. Below is an example of a policy that restricts access to the resource
{
  "Id": "Policy1707201965719",
  "Version": "2012-10-17",
  "Statement": [
    {
      "Sid": "AllowAllCloudFrontPermissions",
      "Action": "s3:*",
      "Effect": "Allow",
      "Resource": "*",
      "Principal": {
        "AWS": [
          "0123456789"   //Replace with your AWS account
        ]
      }
    },
    {
      "Sid": "AllowAllS3Permissions",
      "Action": "cloudfront:*",
      "Effect": "Allow",
      "Resource": "*",
      "Principal": {
        "AWS": [
          "0123456789"  //Replace with your AWS account
        ]
      }
    },
  ]
}
Install W3 Total Cache plugin
Proceed to install and activate the W3 Total Cache plugin on your WordPress site.
Go to Wordpress > Plugins > Add New Plugin. Search for the name W3 Total Cache and proceed to install.
Connect W3 Total Cache to CloudFront with IAM
Go to Performance > Configuration: Objects. Configure the fields using the parameters shown in the image below. Remember to replace the values with your Access Key ID, Secret Key and bucket name.
If you choose to Create as new bucket with distribution, the plugin will automatically create a new S3 bucket and CloudFront distribution. However, ensure that the IAM user has the necessary permissions to create both resources.
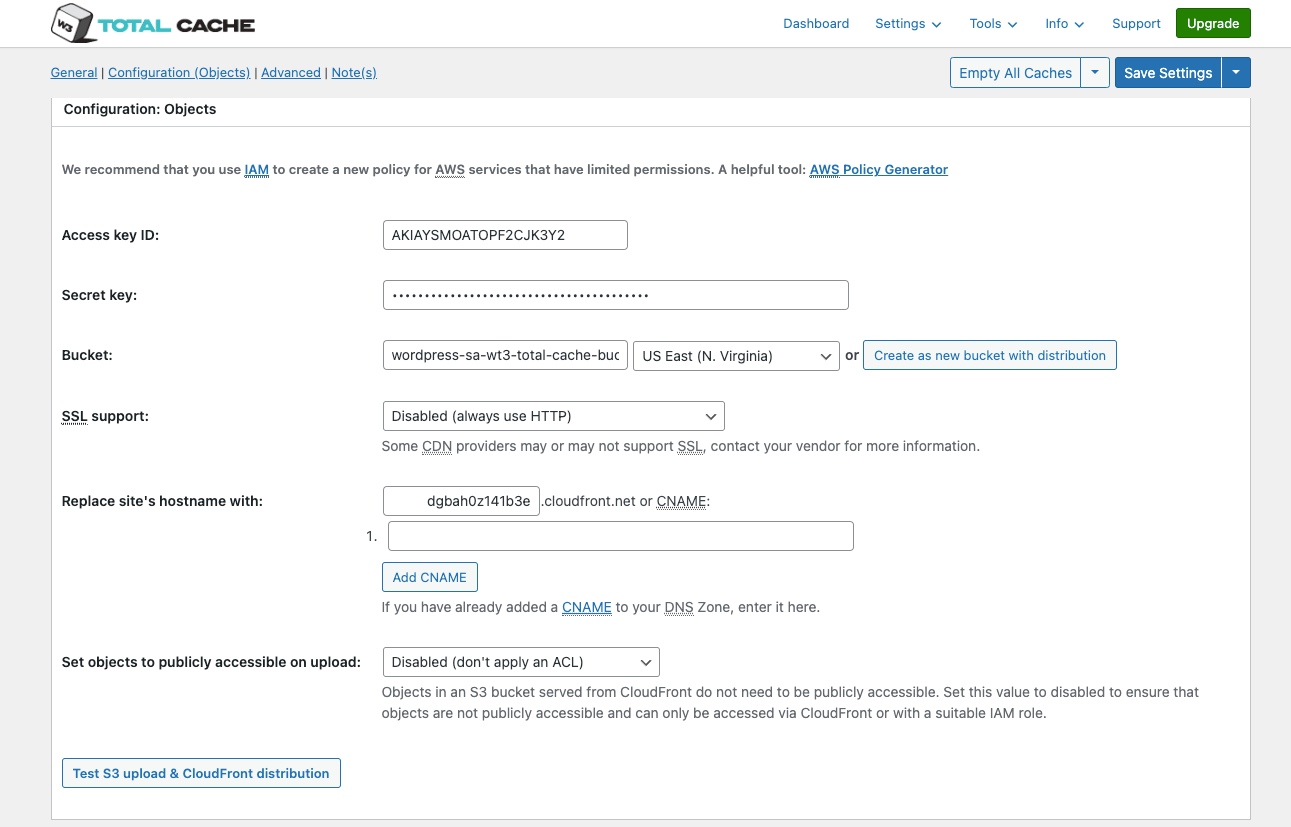
After the resources are created, click Test S3 upload & CloudFront distribution to verity that everything was done well.
Enable CloudFront CDN
In this section, we're going to we'll enable the CloudFront distribution for your WordPress static content.
There are 2 types of possible options here.
- Amazon CloudFront:
This is the simplest option, when a user request for first time a static content, it goes directly to the origin, which can be either, the ALB (Application Load Balancer) or an EC2 instance. However, keep in mind that the server will need to handle all non-cached queries. This translates to a heavier load for the web server, potentially requiring more resources.
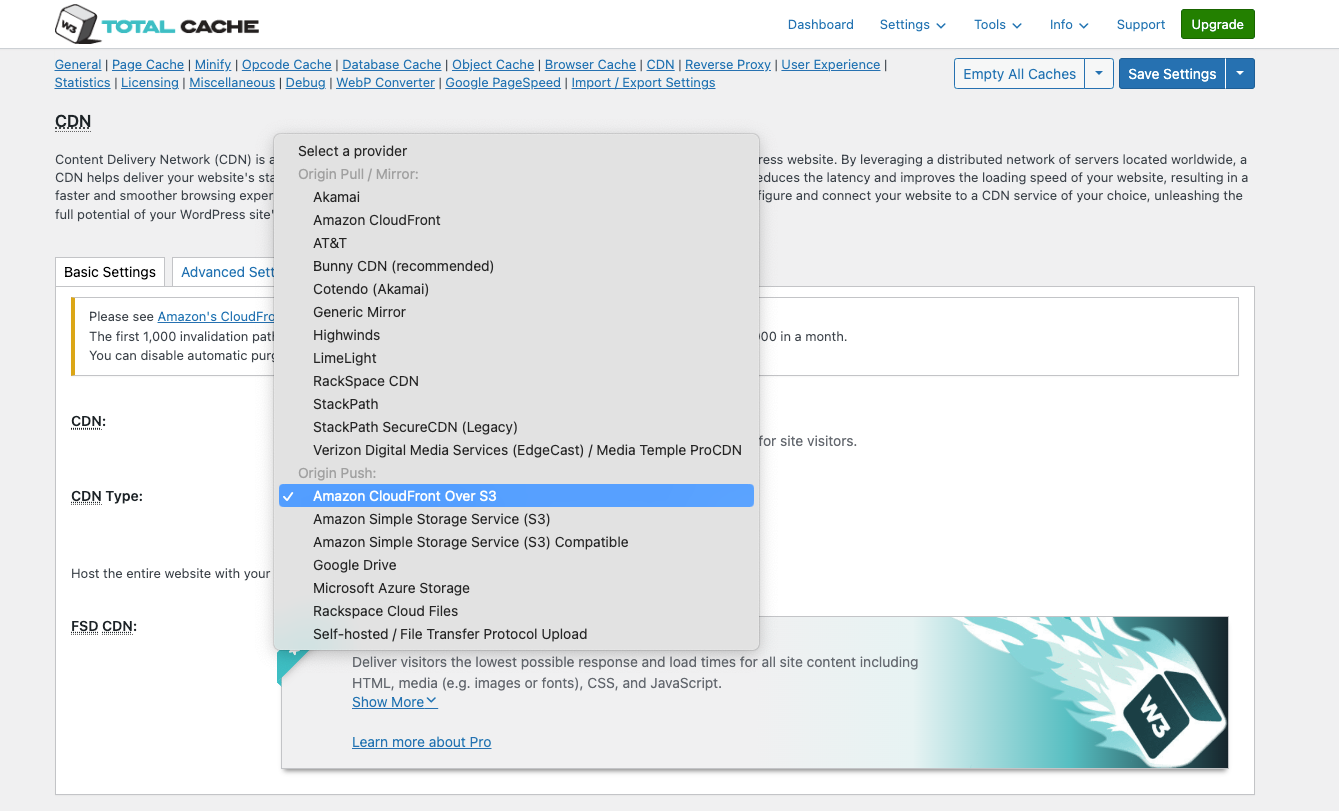
- Amazon CloudFront over S3:
This option introduces an additional layer on the architecture, an S3 bucket. It positions your static content closer to users, offloading your web server from handling all static content requests.
You might be wondering how the static content gets synced to S3 from Wordpress? Simple, Wordpress relies on the W3 Total Cache plugin to automatically synchronize static files from your WordPress folder to the S3 bucket. This setup offloads your server resources since all static content queries are served directly from the bucket, leading to faster response times for users, especially during their first visit.
The best configuration that you choose will depend on your specific needs. Let's explore detailed setup steps for both options.
Option 1: Setting Up CloudFront CDN with ALB as Origin
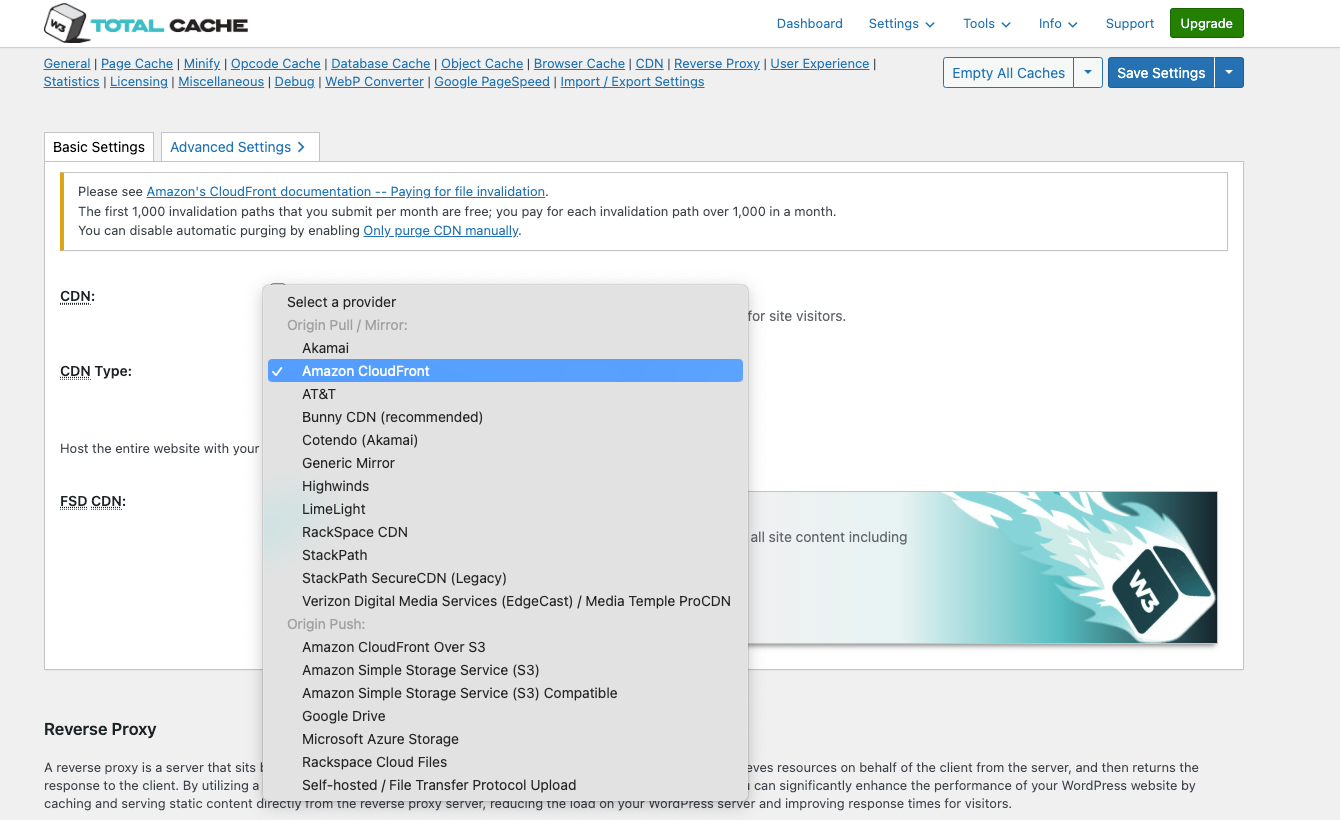
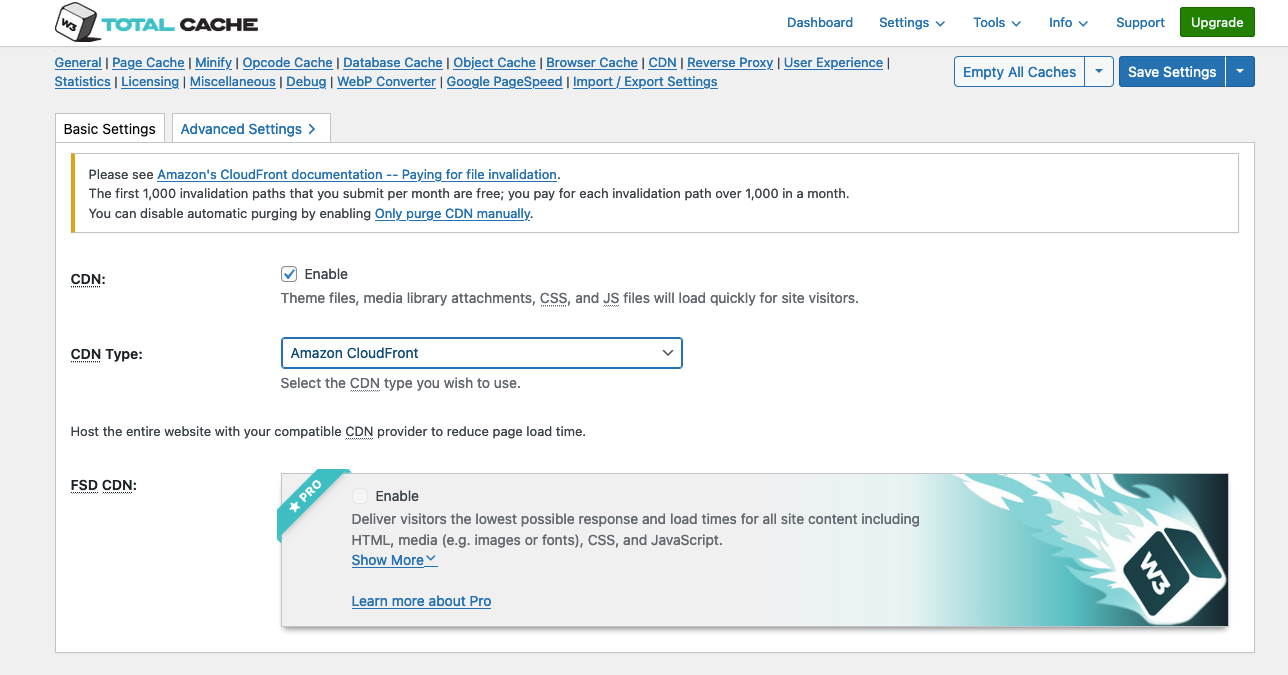
Go to Performance → General Settings → CDN. Then Click Enable in CDN and CDN Type choose Amazon CloudFront from the section Pull / Mirror in the dropbox
Option 2: Configure CloudFront CDN with S3 Origin Setup
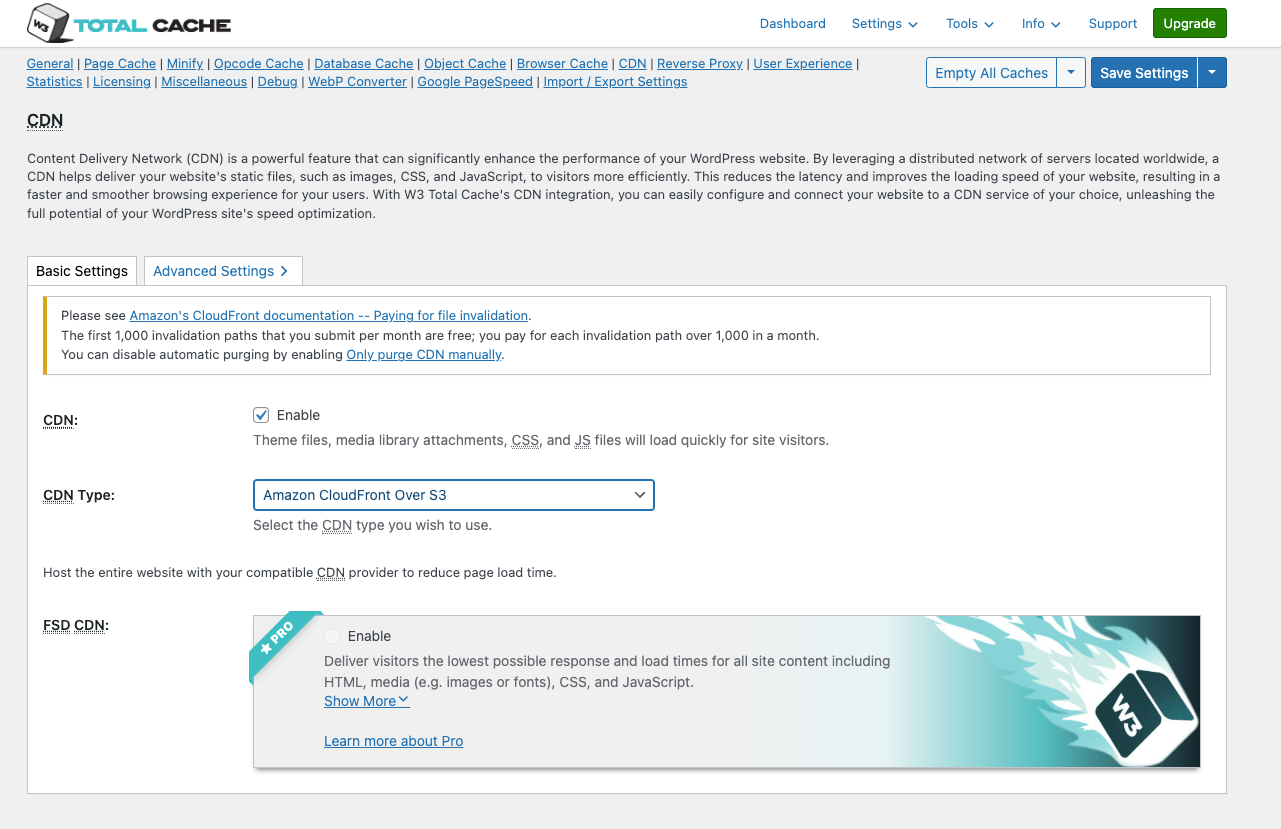
Voila! Your CloudFront distribution should work now. An easy way to verify access to a page of your website that contains an image. Right-click on the image and choose Open Image in New Tab.
If everything is set up correctly, the image URL should begin with https://<your-cloud-front-distribution>.cloudfront.net/


